Showing posts with label detergent bottle. Show all posts

Tuesday, April 29, 2014

Melissa Shuford: Week 4 Detergent Bottle

 Ghosted Image
Rendered Image
Rendered Image
Rendered Image
For this project I took inspiration from a very basic soap bottle design. The bottle is a classic shape and feel with a smooth cap. Underneath the cap, however, I chose to make it more detailed to allow for saving soap. The design has a lip around the screw cap to allow for less soap to spill all over the bottle and then has three tiny holes that will allow the lip area to properly drain.

To create my detergent bottle I used network surface, booleanunion, boolean2object, booleandifference, fillet, blend, and offset. To create the nozzle I used helix, pipe, booleandifference, boolean union, fillet. I then booleanunioned the body and nozzle together before offsetting them to create the inside cavity. I then created the top using two cylinders booleaned together than booleandifferenced with the nozzle to insure a perfect fit to the screw cap before then eshelling out the lip section by creating another cylinder and booleandifferencing it. Then to finish the design, I took the cap off and booleandifferenced three skinny cylinders inside the lip to create a drain system for the lip.

For the materials in the bottle I chose a bright yellow plastic with a rough finish for the top. I then chose an off-white, rough plastic for the body with a shiny blue handle and a rough, light-blue fillet for accent. I then created a png file of the "all" logo before adding a label to the rough white plastic layer through the editing material options.

Tuesday, April 22, 2014

Xiaoyang Chen Week4 Bottle

For my design of the bottle, i try to make it look simple and clean. At the same time, I try to make it as efficient as possible, which means the biggest volume it gets at the notice space. The Z shape makes it look taller and wider.

I used loft, sweep2, filletedge, booleandifference, booleanunion, offset, and many other commends through out the process. I used loft, sweep2, patch, networksrf for the body of the bottle. And filletedge and pipe for the transition for the different sections.

For the material wise, all I used was plastic. I used hard shinny plastic for the body of the bottle. The transparent plastic for the cap of the bottle. For the colors, I mainly used the orange like Tide do and brighten it up with a little bit of yellow.

Christian Edwards Week 4: Detergent Bottle


My detergent bottle was inspired by a tear drop or a rain drop.  I wanted this product to be a fun/slick design that gave the consumer a more natural feel to the act of washing clothes.  This design can also hold more liquid than the average bottle due to its fatness in size.

The tools I used to make this bottle in Rhino were pipe, curve, extrude, sweep2, trim, boolean difference, and helix, etc.  This project had many different commands to make it possible.

The materials I used were hard plastic.  I used a baby blue to represent a teardrop or raindrop, and orange to to accent the piece as a whole.  The colors play together well. 

Shameka Browne-Heskey: Week 4: Detergent Bottle

Ghosted Image

Perspective View

Perspective View - Top Off


Laundry was the inspiration for my detergent bottle. I wanted to keep my design simple.

I started by creating a network surface for my curves. Then I created a planar surface to seal off the top and bottom of the bottle. I projected a curve partially onto each side of the bottle, then i piped the curve and Boolean Differenced it from the detergent bottle. The screw cap was made using a series of cylinders and the helix tool, and I added a chamfered edge to the inner cylinder of it.  The handle and neck of the bottle are slightly piped and blended.

The material choice for the bottle was hard, yellow plastic. The neck and cap are made from a hard, shiny and translucent pink plastic. I chose these colors because the pink color is easy to spot when you're in a hurry, and the color yellow is proven to make you want to get the job done without any delays.

Monday, April 21, 2014

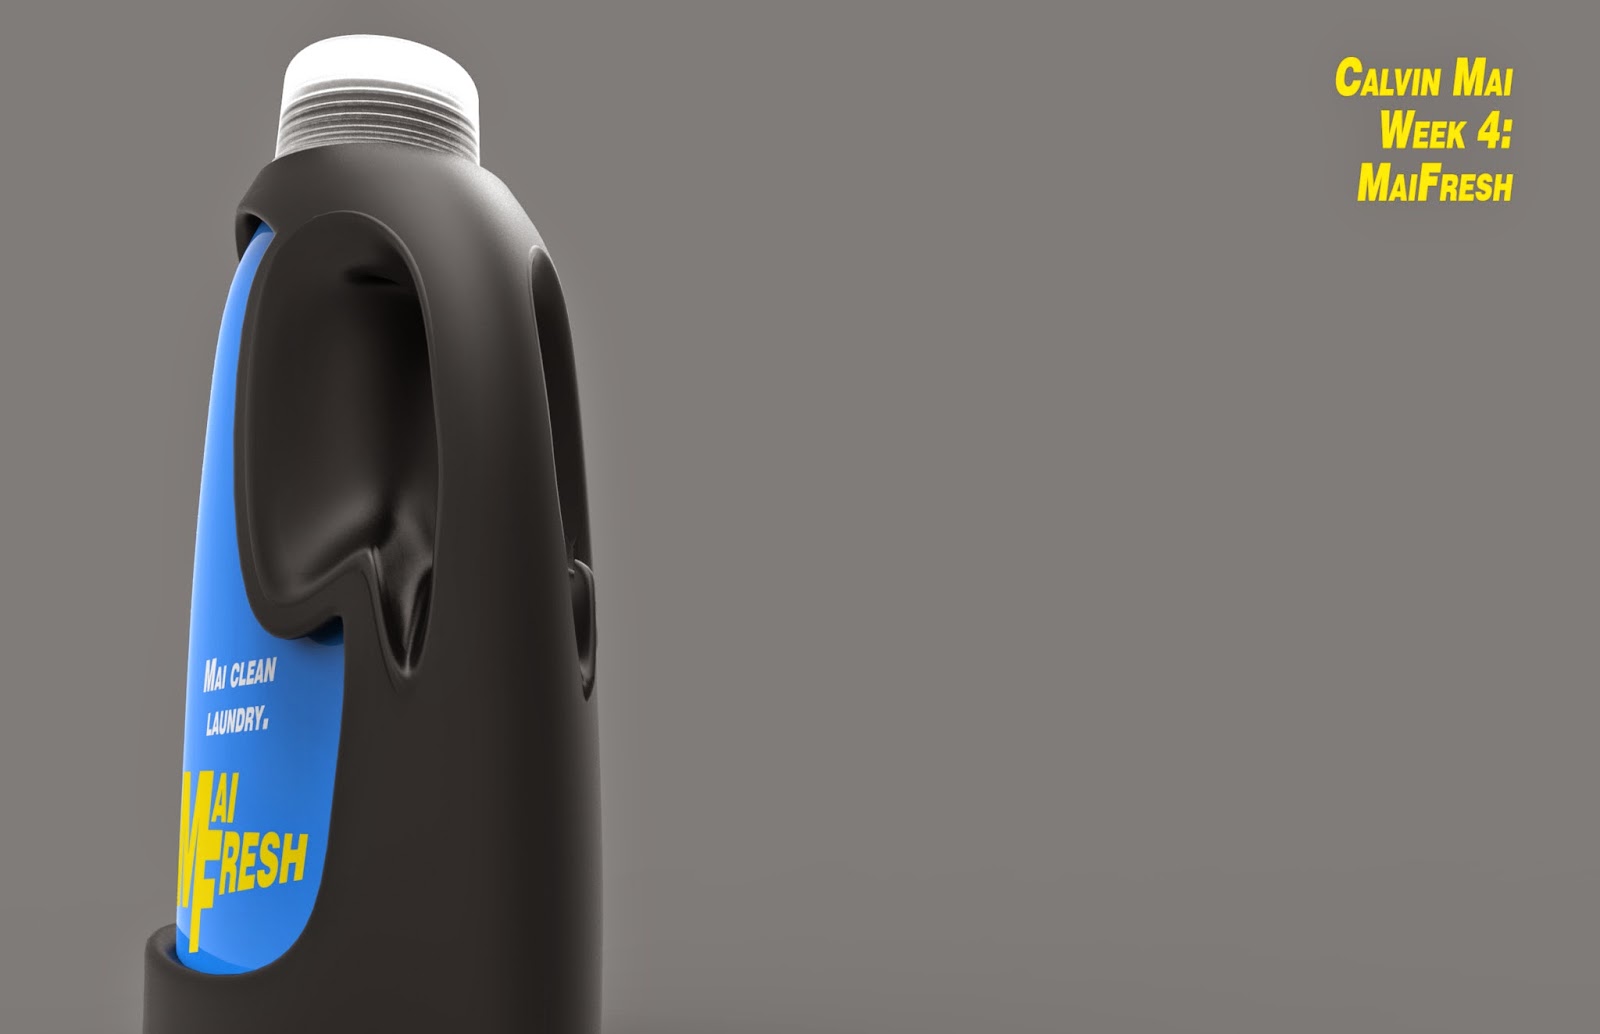
Calvin Mai: Week 4 Detergent Bottle


I looked at the reference images, and noticed that none of the detergent bottles looked very sleek or windswept. So I took reference mostly my imagination, making the curves to make the detergent bottle sleek and sexy smooth. Now that I look back, I can see some car, specifically a Jaguar that I associate with this car that I could have used as a reference. For the name, I derived it from my last name, and added a clever pun to increase marketability.

For my model, I started out with a loft and sweep 2 between curves, that I drew, then I split each part into sections that I could delete away, for example, the handle. Then after that I would blend the surface to get it blended, filleted some edges, Split, trim, Helix, Orient perpendicular to curve, among lots of blend surface and join to join it all together.

For my materials, I chose a hard rough black plastic for the main body to increase grip, and a shiny blue plastic to give it it's sleek quality. For the cap I used a cloudy plastic, much like the caps seen in detergent bottles today.

Nico DeLuca-Verley: Week 4 Detergent Bottle

Material Assignment Image


 Ghosted Image


     My detergent bottle was purposed to be held by the entire hand reaching through the bottle instead of clumsily holding it by the side. I wanted to create a bottle that could hold as much detergent, of not more, than any other detergent bottle but would allow for maximum stability as well. I created offset surfaces in both the bottom and the side where there would be a logo. I actually used offset surface to make the bottle have thickness instead of just being a surface. It is thin but can easily hold liquid. I also wanted to make the cap as ergonomic as I could so I made the curves of the bottle cap blend with those of the bottle itself. 

     To make my detergent bottle, I used many different techniques and actions. To create the original form of the bottle, I used curve and sweep2. To create the details I used the split, trim, blend, sweep2 and filletEdge. As for the offset surfaces, I used split, offsetsrf, and blendsrf. I also employed the join edges command quite a bit. To create my bottle cap and thread, I used cylindar, helix, orient perpendicular to curve, sweep1, scale1D and 2D, fillet edge, and trim.

     I used all plastics for my detergent bottle. For the main body, I used a bright red plastic that would act as the eye catching aspect of the design. For the hand sleeve, the label area (offset surface), and the cap, I used a clear, shiny, dark gray plastic. Finally, I used a light gray for the curved edges and the threaded top.

Rafael Kader: Week 4 Detergent Bottle

 Ghosted Image

 Rendered Image 1
 Rendered Image 2
Rendered Image 3

I started this detergent bottle following some tutorial instructions and I also edited the control points to create a cool body. Basically, in this project my initial idea was use unusual shapes and colors. I tried to build a model that not only looks like a real detergent bottle but also looks sufficiently distinct to the others in order to get the costumer's attention. Moreover, the whole bottle's shape was designed in order to get smooth curves and an ergonomic grip.

The body of this model was made after edit the curves' control points using the command Sweep2. It creates a smooth and clean appearance. In addition, the main commands that I used to create this bottle were ExtrudeSrf, Split, Scale, Pipe, Blend, and OffsetSrf.

To render, first of all I chose a Hard Red plastic to the body in order to get attention to the product. Second, I chose a shiny Blue plastic to contrast to this red body.

Sunday, April 20, 2014

Joel Salomonsson: Week 4 Detergent Bottle

Ghosted 1

Ghosted 2

Render 1

Render 2

Render 3
Render 4

I got my inspiration from the cheep bottles at Kroger with simple shapes and logos. The bottle have plenty of room for detergent and is designed to be held with one hand. 

I used curves and loft to get the main shape I the bottle and extruded a curve where I wanted the handle to be and then used the extrusion to spit the bottle so that I could create the smooth handle through loft and filletEdge. I created the cap and screwthred by creating a cylinder and marching a helix to it and sweeping a curve to create the third. I used filletEdge on the thred and used Boolean on my cap to match them together. 

I wanted to create a very simple bottle with very generic colors and I felt that using matt blue and red plastic was a perfect fit. I then created a logo for the bottle and I thought that naked edges is something that we want to get rid of from our models so I based the logo on that idea. 

Sunday, February 9, 2014

Juan Sebastian Moreno: Week 4 Detergent Bottle

 Ghosted View
Ghosted View Pedestrian
Pedestrian View
Side View


        Entering now the 4 week of computer modeling, I realized how much I've learn using Rhino and keyshot. Now, I was inspired by the detergent brand Ariel. I decided to do so, since it brings childhood memories; those sunny days playing out side in the field and cleaning my forehead with my shirt, rinsing the aroma as I brush away the sweet. In addition, the over all shape of the bottle, was design to hold more amount of detergent in a average size container. Thus reducing manufacturing costs, as well as being made from all ECO recyclable materials.

      Coming to design the bottle using rhino included: first starting by drawing a line using curve(interpolate point) to have a G2 smooth curve curve in order too have no problems later on. Second, using the same command curve, drawing the side of the bottle too later sweet2 thus creating the surface around. The details are now using a line cutting the plane using trim and later extruding the line. For the logo I first took a side on the plane to create it, later I set it aside of were I wanted to be, as soon it was touching the intersecting surface I boolean difference it and later chamfer and fillet edge most of the sides. For the detergent cap, is began with a cylinder base that I later attach a helix, from the helix I sweet1 with an addition figure attach to its end.

Finally, the materials stick to basic plastic, glossy, colors that are cheep and attractive to the costumer

Thursday, November 21, 2013

Sarah Zambrana Week 4: Detergent Bottle


For this design, I wanted to stick to the typical shape of a detergent bottle but (with the help from the tutorial) I also brought some interest to it with the different shapes connecting the different materials. The tools I used most to create to forms were blend, offset, fillet, and also the boolean difference command. I actually really enjoyed making this bottle. The form and blends turned out really nice.

Thursday, October 17, 2013

Elliott Lane: Week 4 Detergent Bottle

For my detergent bottle design, I had fun employing the offsetsrf tool in several places and considering the kinds of shapes that would be interesting to use. For the materials, I used mostly plastics and a soft touch material for the cap of the bottle. 


Tuesday, October 15, 2013

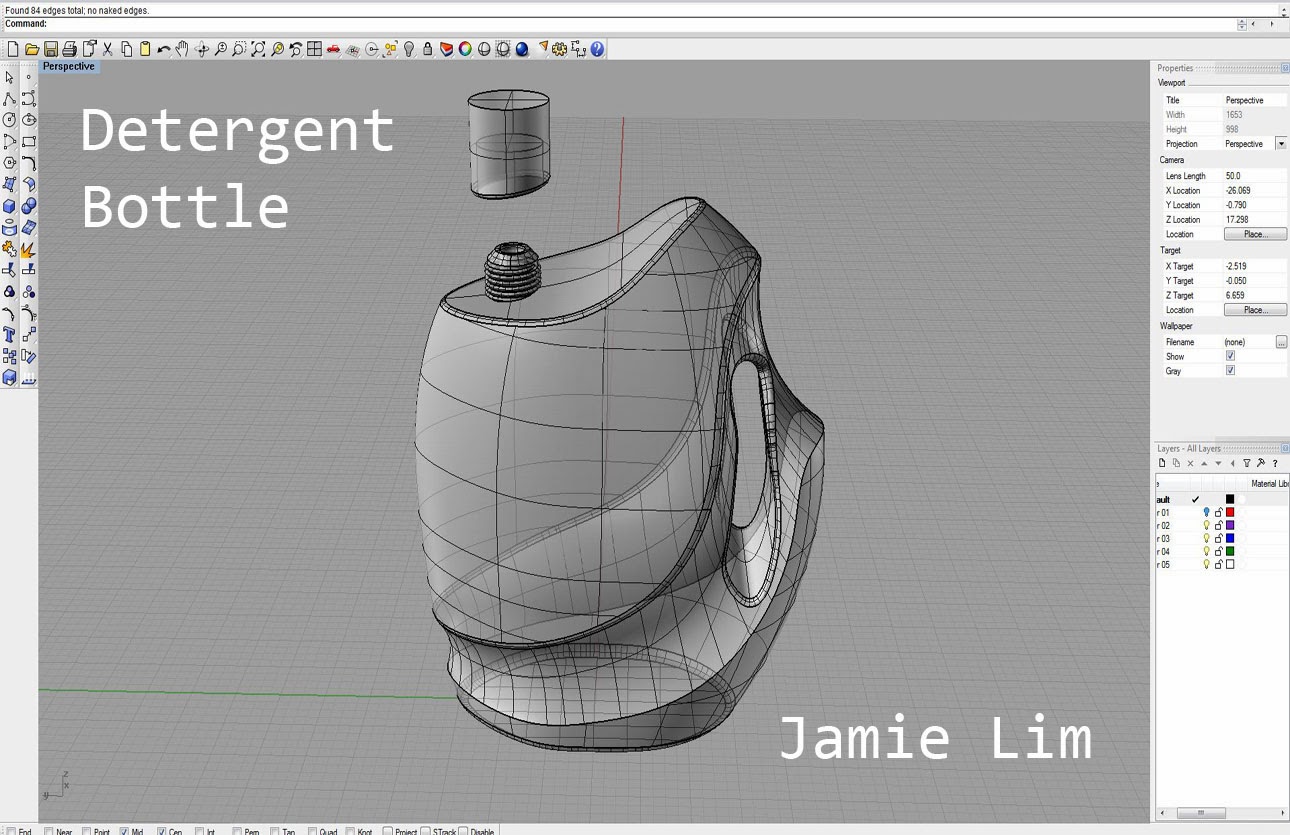
Jamie So Whi Lim: Week 4 Detergent Bottle

For my detergent bottle, I focused on making it look pretty because most of the customers who buy it are women. I made the bottle pink and added a picture of flowers so it would make it look clean. I used sweep 1 and sweep 2, trim, helix, and scale the most for this bottle. I used shiny plastic and clear plastic for the bottle. And I used the color pink because it matched the color of the flower for the aesthetic values. 


Oliver Filley: Week 4 Detergent Bottle

Ghosted


Layers for Keyshot

Keyshot Render 1

Keyshot Render 2

For my detergent bottle I wanted to make a bottle that would feature a lot of cutouts and contrasting colors. To create the bottle I used sweep, Boolean 2 object, Boolean difference, fillet, and offset. For the cap I wanted to create a cap that would be easy to put on and take off so I went with a snap cap design. The top of the bottle has sharper edges to allow it so slide and snap into place.  In Key shot I used a combination of hard plastics to create the bottle in order to keep cost down and provide durability.

OliverFilley Fall2013 ELDS205 Detergent Bottle