Monday, November 4, 2013

Oliver Filley: Week 7 Lamp

Ghosted

Lights On


Lights Off


Jet Engine


light on


light on
light on


Light off

Light off

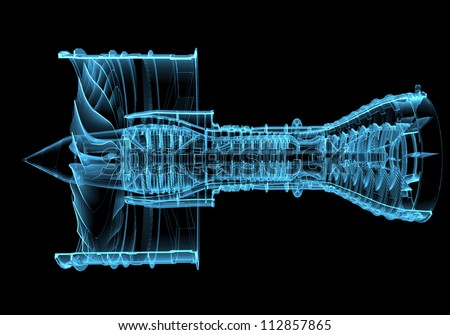
For my lamp I was inspired by the design and shape of jet engines. I set out to create a lamp that would somewhat resemble the structure of these machines. I found many pictures to help guide me like the one above.

 I started by using the picture frame command in rhino to import the picture of the jet engine above. From there I traced half the image and made adjustments to the shape to make it suited for a lamp design. I then revolved and offset the image to get my base shape. After that I created horizontal and vertical sections which I then ran the intersection curves command on. After finding all the intersections I made pipes and block commands and snapped all the pipes to the intersection lines. After all the pipes were set I split the pipes and the surfaces creating the laser cut images of the lamp with the help of the massive unroll script. From there I extruded the models to the proper thickness for the 3d model.

In keyshot I chose a clear plastic with a brownish bronze tint to resemble the material I will build my lamp out of (bronze acrylic). I used render passes along with custom keyshot environments to create the lighting and effects for the product. For the custom environments I used the three overhead lights option then used the HDR settings to modify the brightness and contrast along with the angle and tilt of the lights.


OliverFilley Fall2013 elds205 lamp

Christian McKenzie - week 7: Lamp


When thinking of radial patters I immediately visualize fruit, watches, and mechanical components. I looked to these things to guide me in my design. I chose a strawberry and a sprocket. I added a perforated pattern as strawberries have seeds on the exterior, to keep the mechanical aspect I made these cutouts round. I came up with a basic gear design and filleted the edges in order to keep the organic properties of a fruit.

In Rhino I used the curve tools to make my horizontal intersections. I measured my hand and devised an interior circumference that seemed I could fit my hand into fit my hand into.  I made the curves into surfaces using the planar curve command in the surface menu. I made the outer curves of the vertical sections by using the horizontal layer for guidelines drawing in the front view. I used offset curve, array, and curve Boolean to make the perforation. I then used the polar array and planar curves to make my vertical intersections. I used pipes and split in order to make the notches in the sections.

In Key shot I chose wood for the vertical sections, I tried to enhance it by adding a bump pattern and making adjustments various adjustments mostly to the contrast, scale of the pattern. Wood has an organic warmth that this more mechanically arrangement needs. I then used a metallic paint on the horizontal sections. The metallic material as an accent puts more emphasis on the interior forms. Without the Metallic, the horizontal layers become easily interpreted as a cylindrical visual mass, or a heavy base, in the rest of the design.


Andrea Young: Week 7 Lamp

Shadow shapes

Lights off
Light on
The Tai Kaku is a radial design based on a pentagonal shape. The majority of the sections were created vertically to create an interesting design when viewing the object from below. The command I found the most useful was also the most frustrating. The blockinstances command worked well to control all of the pipes but was bothersome when trying to separate the two halves. Luckily the explode command worked well to fix this problem.
My design has pulls inspiration from lattice patterns as well as traditional japanese architecture. I used this inspiration to create my object name, Tai Kaku, meaning matrix in japanese.

Jay Jones: Week 7 Lamp


My lamp was inspired by biomimicry and the organic approach. Throughout my life I have always been drawn nature and it's magnificent yet simple application in design. Nature is what shapes the world we live in regardless of where we are. I used a Live Oak tree as a basis for the trees shape and used it to apply the same shape to a lamp, which to me makes it look organic. The materials used in Keyshot were wood with grass textures being that I couldn't find a leaf pattern. I used glass for the light bulb and area point light for the filament inside it which is set to 60 watts to represent my bulbs intensity. I used Ash wood for the bottom of the lamp to show the trunk of the tree. In Rhino I had a little fun because I used Curve2View being that I'm going to curve my wood to make it look like its swaying in the wind like a natural tree and I remembered that it can't be curved for th Massive Unroll method so I used a command called Slam to flatten the surface again and make the unrolled surface correct. I also used ArrayPolar, pipes, Boolean Split and Revolve.

Andres Poch: Week 7 Lamp

For this project I wanted to design a night stand lamp to put in my room, since I don't have one yet. The main inspirations were Lite Source LS-2996 Quatro Mini Table Lamp (image link) and the way i wanted the light to be seen from the top view. The outside shape of the lamp resembles the silhouette of the popular lamp, but the way its sectioned allows for more light to come out. Also, due to the arrangement of the upper horizontal sections, the bulb lights up the design creating an amazing pattern from the top view.

The main tools that I used to create this model were: Picture Frame, to pull out the lines from the original lamp; Revolve, to create the root solid; Twist, to alter the inside shape for the top part of the lamp; Boolean Difference, to create the hallow spaces inside the lamp; Contour and Section, to create all of the planes. Finally, Extrude Surface, to give thickness to the surfaces.

The materials that I decided to use for this lamp were a dark wood and white hard shiny plastic. I selected this materials to create a contrast of color and of material. Also, using the white plastic allowed for more light to be reflected, creating a better lamp.

Laser Cut Prototype


Keyshot Renderings


Ghosted view


Layers View


Fabio Bonacquisto: Week 7, Lamp

 Ghosted

 Off

On
For this project I didn't really know what I wanted the lamp to look like, all I knew is i wanted to make something I would like putting up in my room. While creating the lamp I made about 20+ different styles until I found the one I liked the most. I ran into many problems because well, I was being sloppy so this simple object took longer then it should of. When using key shot I used materials that I would like to use for the real one but the one I'm making in real life is all wood. So in the render I used hard plastic and wood with a plastic finish on it to give a good reflection of the light. I chose a green light because my favorite color is green and that's the color light i will use on my real lamp.

Andrea Carriquiry Week 7: Lamp


For this design i was inspired by a star, but no the regular stared shape, i was inspired by the actual stars, the fireballs emitting light from space. When i started with this project my mind was set on two things, either do something completely organic, or something entirely geometric. I decided to go with the second one to give it a more elegant and modern feel to it. 

To model my lamp i begun with 2 cubes which i overlapped and rotated to create the shape of the star, then i boolean them together to get the final shape. I decided to put a square hole in the middle of the lamp to get easy access to the lightbulb which will be held by a 1” hole. I decided to go with simple pieces, since my idea was to sell this lamp in separate pieces, to occupy less space in stores, storage and have people connect the pieces, like a puzzle. To create the notches i used the waffle tutorial and then the piping one. 


For materials i decided to try and replicate the wood i had actually bought for the laser cutting, Luan. I went with a Wall nut wood to which i scaled the pattern to look more like the wood i had purchased. For the final product i am going to leave the lamp unpainted, i might give it a coat of varnish or something similar to give the Luan some shine, as well as a more polished and finished touch.

Tevin Moore:Week 7 - Lamp

 
F5T Lamp Ghosted with Layers, Edges, and Command Bar
 
F5T Lamp Keyshot 1 with Orthographic Views
 
 
F5T Lamp Keyshot 2 with Isometric Views and Cutsheet

F5T Lamp Lasercut Lights Off

F5T Lamp Lasercut Lights On


My lamp design was inspired by the form of a tornado. Weather has always fascinated me so when it came to thinking of a form to use for this project, I decided to go with a cyclonic form. For my modeling technique I used the Contour command, the Section command, ArrayPolar command, Pipe command, Intersection command, the Extrude Surface command, the Sphere command, the Truncated cone command, the Boolean 2 Objects command, the Polyline tool command, and the Control Point Curve command. The materials I used for this model consist of Haringold Wood, Ash Wood, Black Anodized Metal, White Basic Glass, Black Anodized Metal Brushed, and Mold Tech. My favorite modeling technique for this model would have to be the Intersection command, I was helpful with creating the pipes that would be used to create the notches. I really enjoyed it.


Max Acevedo : Week 7 Lamp


This lamp was inspired by my favorite sport with is golf. Every day at practice I always see golf balls so I decided to create a golf lamp with this beautiful image. This is a golf ball in a tee. IT mean a lot for me. I decided to create all of the horizontal contours of the ball visible. The light bulb is early reachable from the top part. I find very useful the section and contour tools. The way we made the notches and how we used Block was very amazing, it makes life easier when designing in rhino something that could change the size. When rendering I decided to go for a Warm color of wood and just place it with warm light as well. I feel that the warm color will look amazing in an office. I chose this name because it is very simple to remember and also it means a lot just to use the word "golf". The Golf Lamp will be a small but beautiful art piece for all around the house, I will use mine in my studio at home.