 |
| -Rendered In Passes- |
 | |
| -Inspiration Board- |
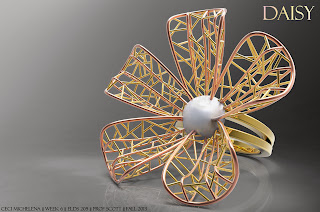
I designed this ring with the intent of using rose gold, 24K gold, and a pearl in the center. For this project I favored the precious metal materials. However, I also showed what it would look like with less expensive materials, such as painted plastic and metal, allowing me to show what the ring would look like in colors more natural to the flower theme.
This is a picture of the ring that was printed on the Projet 3D printer. I had to make a couple changes to my model to make it optimal for printing. I made the pipes slightly thicker to prevent them from breaking. The way I constructed it initially would have been okay for printing, but it would have most likely broken in the bath after printing. The ring is sized accurately for my finger and I did this by matching my size to a ring chart and knowing the diameter in mm. Next, I would like to send my model to Shapeways to get it printed in metal! I love how this ring turned out.


No comments:
Post a Comment
Note: Only a member of this blog may post a comment.