For this project my main focus was creating a model out of foam that would translate well in a scan with my little knowledge using the 3D scanner. My partner and I created a large scale jelly bean in which we took several scans of 12 pictures each. We then aligned them to create one solid mass. We moved the file over to Solid Works to polish and sand the model. Once I had the file in Rhino I decided to make a child's phone shaped like none other than a Jelly Bean! I used the project command a lot on Rhino to add onto the form since it wasn't a perfect, smooth, and symmetrical object. With my materials I used brightly colored, hard shiny plastics to give it an appeal to children. Its also very durable which I would assume would be necessary. So there you have it..The Jelly-Phone!
Showing posts with label MackinleyFarmer. Show all posts
Wednesday, November 20, 2013
Mackinley Farmer: Week 10 3D Scanning Project
For this project my main focus was creating a model out of foam that would translate well in a scan with my little knowledge using the 3D scanner. My partner and I created a large scale jelly bean in which we took several scans of 12 pictures each. We then aligned them to create one solid mass. We moved the file over to Solid Works to polish and sand the model. Once I had the file in Rhino I decided to make a child's phone shaped like none other than a Jelly Bean! I used the project command a lot on Rhino to add onto the form since it wasn't a perfect, smooth, and symmetrical object. With my materials I used brightly colored, hard shiny plastics to give it an appeal to children. Its also very durable which I would assume would be necessary. So there you have it..The Jelly-Phone!
Mackinley Farmer: Week 10 Camera
For the design of my camera I wanted to do something fun and playful since most of my other designs for the class have been more mature and serious. I started by creating the general shape of the jelly been by altering the control points of an ellipsoid. I then added the lens by starting with a cylinder, projecting a slightly larger curve onto the surface of the jelly bean, splitting it, and then blending it. This was the workflow that I used through the majority of the project. I enjoyed playing with the tangency and curvature of the blend surface command to get a more interesting shape.
For the materials I went with hard shiny plastics to give it an appeal to a younger audience as well as making it durable. The black parts are rubber to help get a better grip. And lastly with the lens and back viewing screen I used a highly reflective hard plastic to give it the reflection as well as durability.
Monday, November 11, 2013
Mackinley Farmer: Week 8 Chair
This design was meant to be a modern take on a typical park bench. The bench was designed so that two people could sit next to each other if they are together or strangers. Usually benches in large cities such as New York have a division in the middle for these reasons. The design is stream line and simple yet it intrigues you to take a seat. I designed it with the thought of it being placed in a park or square in a bustling, fast paced city. The modeling techniques I used for the majority of the project would be the pipe tool, and orient on curve for the outer tubes, which are a pentagon shape, and then a Sweep1. I also used Extract Isocurve, Split, then Blend to get rid of the kinks and create a nice flowing tube. For the materials I wanted to keep it simple so the frame is aluminum and the seats are a perforated leather which would have a little give and allow water to not collect.
Monday, November 4, 2013
Mackinley Farmer: Week 7 Lamp
When designing this lamp I wanted to keep it simple and modern. I started with a truncated pyramid that is upside down and then cut out the middle with a cylinder. I wanted to use a lesser amount of horizontal surfaces to keep it from looking cluttered. The material is just a natural wood so it will be durable and rugged in contrast to the design. For the base where the light bulb would screw in, as well as the cord, I used a pop of color to make it more interesting. Usually the cord isn't an important part of the design so I made it more interesting. To create the waffle structure I used the contour and section commands to find the horizontal and vertical surfaces. Then I used the curve from objects, intersection command to find where to place the pipes. I then used the pipes to split the surfaces to create the notches.
Monday, October 28, 2013
Mackinley Farmer: Week 6 Ring
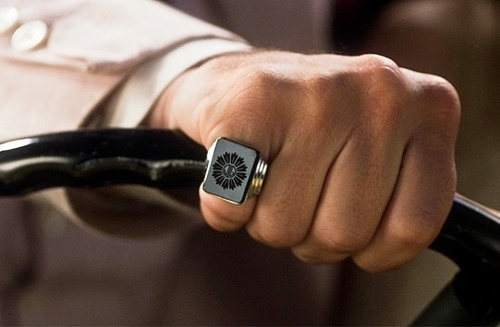
The modeling techniques I used were the typical extrude curve, sweep2, boolean union and difference. The command I found the most useful would be Curve from 2 views to match the sides of the ring. I also used the text tool for the first time to make solids and boolean differenced them out of the main stone. For the details around the initials I created a circle and then used Array along curve.
For the materials I wanted to keep it similar to my design inspiration so I used a polish silver for the main part of the ring. The middle stone is a rough black plastic and the details are a hard shiny plastic to make them pop more. I went with a simple lighting environment and just bumped up the contrast a bit and darkened the background some.
Monday, October 21, 2013
Mackinley Farmer: Week 5 Glasses
For the design of my sunglasses I wanted to blend a classic aviator shape with an edgy twist. The name was inspired by the new Lamborghini Aventador. http://www.lamborghini.com/en/models/aventador-j/overview/
The Aventador is named after a bull. The Aventador was a bull that fought in the bull ring of Saragossa, Spain in 1993. I chose rustic materials and colors such as the wood along with crisp, sharp materials such as the gold and cream plastic. Modeling techniques I used were the line tool, trim, offset, extrude curve, and mirror.
Monday, October 14, 2013
Mackinley Farmer: Week 4 Detergent Bottle
With the design of my detergent bottle, I decided I wanted to help make doing laundry fun. To achieve this I used a shape that isn't typically found on the shelf and I used the classic black and white coloring with the pop of the bright, electrifying colors. The main tools in creating this would be Project, Offset Curve, Loft, and Sweep2.
Mackinley Farmer: Week 4 USB
In the design of my USB I wanted to create the typical shell but when choosing materials I chose ones that would be durable since this is a product that is "used and abused". Also it wouldn't look half bad hanging on your key chain! The modeling techniques I used most would be the Offset curve and Extrude curve.
Monday, October 7, 2013
Mackinley Farmer: Week 3 Mouse
For my mouse design I wanted to go for something a little more futuristic while still playing with various textures and a pop of color. The tools I used for this assignment mostly included Loft Surface, Mirror, Curvature Graph, Project, etc. I also played a lot with rebuilding and moving the control points. The main green texture is actually silk so I thought it would create an interesting experience to the user. I also used glass to hopefully give a cooling effect to your hand.
Mackinley Farmer: Week 3 Hammer
I wanted to design a simple, modern hammer with classic accents such as the wood. While working on the hammer I used several commands such as Trim, Rotate, Blend Surface, Project, etc. I obviously wanted to use metals since it is a hammer but I wanted to choose certain metals that you wouldn't expect. I used lighting that would reflect on the surfaces but not be overbearing.
Monday, September 30, 2013
Mackinley Farmer: Week 2 Flashlight
After the flashlight was 3D printed I decided to remove the two back tubes to make it easier to hold. I realize this differs from the original design but I feel the need for this product to function properly prevails over the importance of the original design.
Subscribe to:
Posts (Atom)