Showing posts with label Kader. Show all posts

Thursday, May 22, 2014

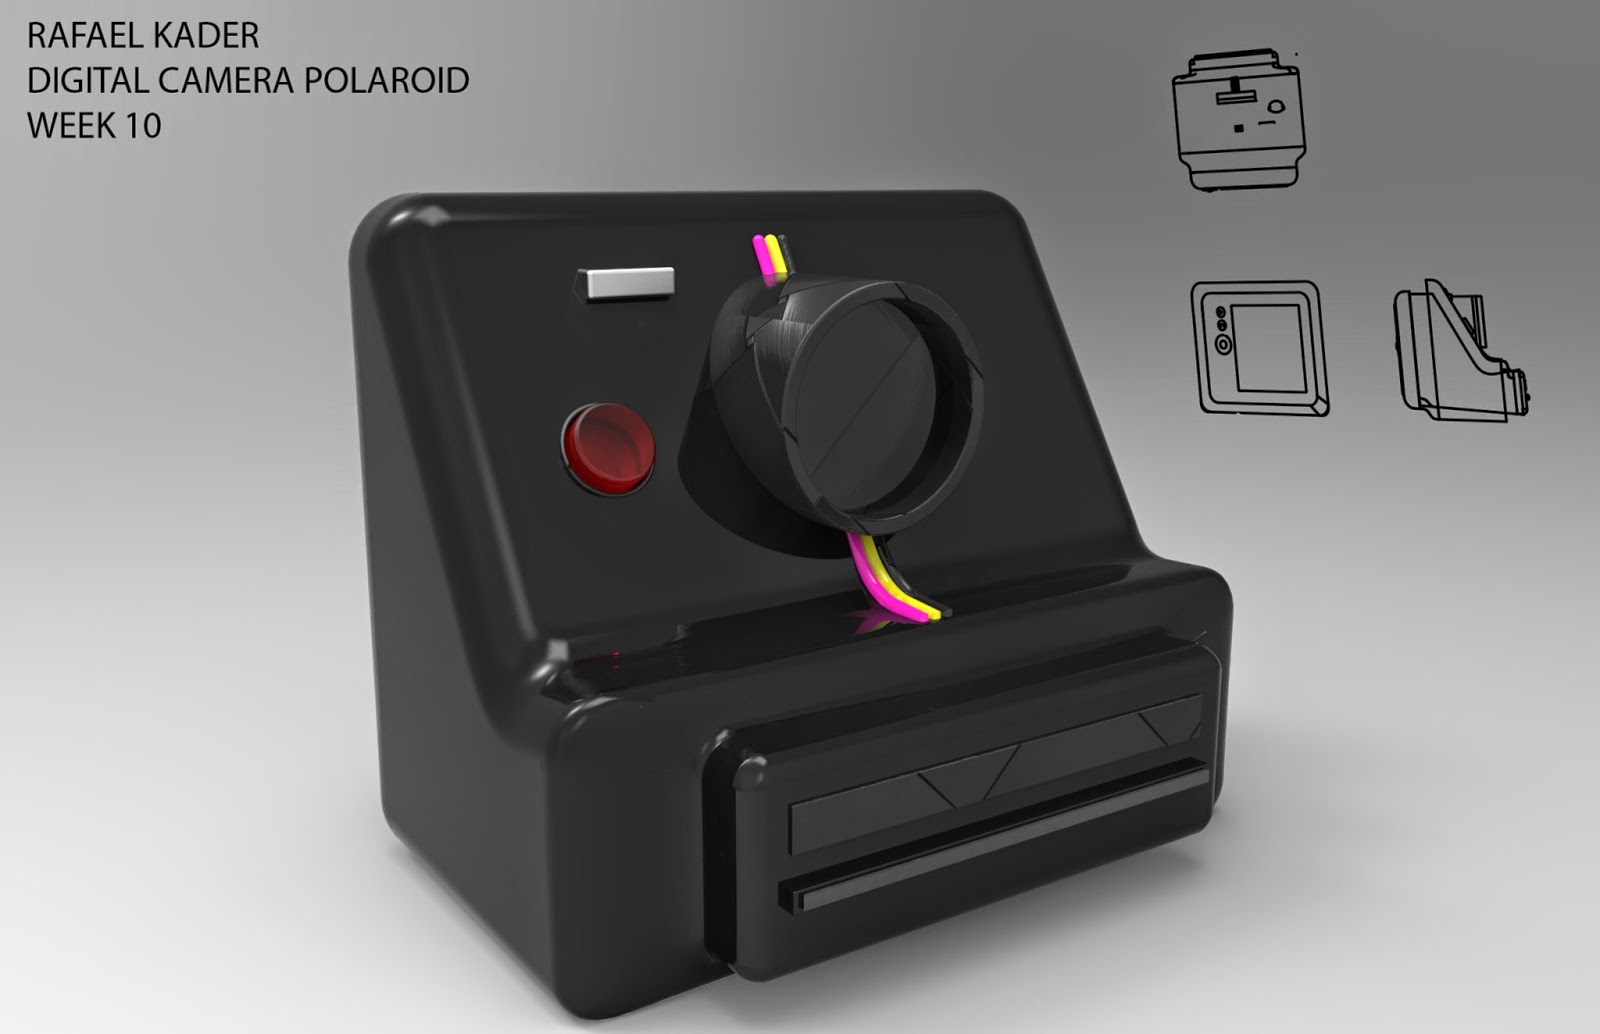
Rafael Kader: Week 10 Camera Model

 Ghosted Image 1
 Rendered Image 1
Rendered Image 2


In this last assignment, I started to create a hypothetical digital model for Polaroid. With this in mind, I tried to use the well-known shape of Polaroid Cameras, adding some new elements, blends, fillets, buttons and the LCD.

The techniques that I used for this project were: I started with a solid shape and then I used the command BooleanDifference to create a smooth body. After that, I used a lot of blendSrf e FilletEdge. Finally, using the make2d command I created the isometric drawing and the top, right and front view drawings.

For the materials, I chose basically different types of plastic to make it look vintage like the old sister of this camera. Moreover, there is a little bit of carbon fiber and aluminum as well.

Rafael Kader: Week 8 Tubular Chair

 Ghosted Image
 Rendered Image 1
 Rendered Image 2
Rendered Image 3


For this assignment, I was planning to create a chair with a simple but unique shape. Also, it was designed for be light and comfortable to sit and to move it around. It is called Futura chair because the shape and materials made it looks like a futuristic chair.

Basically I started this project following a bench tutorial, and then I added my own ideas and elements to this chair. The body was primarily a closed curve that I applied sweep1 to create the extruded surface. After that, I created the sit using extrudeCrv command, Trim and pipe.

In keyshot, I chose a Hard Shiny Black Plastic for the body to make it light and smooth. For the sit, I choose a variety of different colors of silk materials.


Rafael Kader: Week 7 Light Model

 Ghosted Image
 Rendered Image 1
 Rendered Image 2
 Photo Light Model Off
 Photo Light Model On
Photo Light Model top view

In this lamp project I started trying to create a Light Model with a twisted shape that suggests movement. After play experiment different shapes, I found on this one the perfect match between the finesse of smooth curves and the robustness of straight lines. It is called Ciclone lamp because of this parallel, smooth and strong.

Specially in this project, I started with a solid and then I used the command twist to create the shape. After that, using the commands Section and Contours to create the sections and the plugins on Rhino to cut the ribs, the final shape was almost done. Finally, using the make2d command I could print it using laser cut.

For the materials, in Keyshot I chose Oak Wood and Hard Rough Black Plastic. The finish product was made of a sheet of 24"x48" of MDF.

Thursday, May 8, 2014

Rafael Kader: Week 6 Ring

Ghosted Image
 Rendered Image 1
Rendered Image 2
Shapeways Image

When I started this project, my intention was to create something that have mystic symbols. So, my inspiration for the Sannyasa Ring was a symbol called Sannyasa, which means the life stage of the renouncer within the Hindu scheme of four age-based life stages known as ashrams. In other words, the Sannyasa is a transition between the material world and the spiritual freedom.

Using this idea, I applied the command Crv2View in two joined curves of that symbol with a circular curve to create the shape of the ring. Moreover, I used commands such as project to create the details in each side  and boolean difference, fillet edge, and blendSrf.

For materials I chose two types of steel for the body and the details and a shiny clear plastic to recreate the precious stone. To render in passes I used the diffuse, reflection, and toon arrangements to make it look real and highlight the details.

UPDATE: 3d printed model picture.
Photo 1

It got just a little bit too small, so some of the details could not appear as good as it should be.

Wednesday, April 30, 2014

Rafael Kader: Week 5 Sunglasses

 Ghosted Image
Rendered Image 1

 Rendered Image 2
 Rendered Image 3
 Drawing 1
Drawing 2
 Drawing 3


The main inspiration for this project was an Oakley Garage Rock sunglasses. As a result, the shape and the dimensions are pretty similar to the original model. Moreover, I tried to create something that I would use and that mix vintage and sportive characteristics.

To model it on Rhino, I started drawing curves over the images that I inserted there. After drawing those curves, I create planar surfaces and then I extrude it to create a solid. Also, I used a lot of Crv2View, FilletEdge, Project, MoveFace, Pipe and Split.

For the materials, I chose a hard black plastic for the body to make it look cool and light, and a clean and shiny blue plastic for the lens to contrast with the black body.

Monday, April 21, 2014

Rafael Kader: Week 4 Detergent Bottle

 Ghosted Image

 Rendered Image 1
 Rendered Image 2
Rendered Image 3

I started this detergent bottle following some tutorial instructions and I also edited the control points to create a cool body. Basically, in this project my initial idea was use unusual shapes and colors. I tried to build a model that not only looks like a real detergent bottle but also looks sufficiently distinct to the others in order to get the costumer's attention. Moreover, the whole bottle's shape was designed in order to get smooth curves and an ergonomic grip.

The body of this model was made after edit the curves' control points using the command Sweep2. It creates a smooth and clean appearance. In addition, the main commands that I used to create this bottle were ExtrudeSrf, Split, Scale, Pipe, Blend, and OffsetSrf.

To render, first of all I chose a Hard Red plastic to the body in order to get attention to the product. Second, I chose a shiny Blue plastic to contrast to this red body.

Monday, April 14, 2014

Rafael Kader : Week 3 Mouse

Ghosted Image
 Rendered Image 1
Rendered Image 2

My model was basically inspired in a Batman's classic car mixed with some characteristics that I like in my own mouse. I started this project trying to create something comfortable to use and also with a shape based in a car. As a result, during the whole project I was looking for smooth curves and ergonomic design.

I made the mouse body's design using some curves to create surfaces and then using the command CreateSolid. Moreover, I mainly used commands such as Split and Move Face to edit faces in order to get a smooth surface, Project, Pipe, Boolean Difference, Fillet Edge, and Mirror to create the details .

The materials that I used in this project are hard black plastic for the body to make it looks like a Batmobile, carbon fiber for the scroll, aluminum for the pipes and buttons, and shining yellow plastic for the front detail.


Monday, April 7, 2014

Rafael Kader : Week 2 Flashlight


 Ghosted View

 Rendered Image 1

Rendered Image 2


I started this flashlight from the idea of create something futuristic and clean. After experiment the command F10 to edit the control points and also use curves to create pipes, I realized that I could draw something that looks like veins and arteries. From that concept, I did the red details and the bracket.

To create the flashlight's body, I mainly used commands such as F10 to edit the control points, revolve to create the solid, mirror, and project to project curves into the solid to create the superficial details that compose the grip area. To construct the bracket, I created a curve using interpolate points and made a pipe from it. After, I used Scale 3-D and Array Polar to create the additional details.

For the materials, first I chose a soft grey plastic for the body to be light and keep the idea of futuristic and clean. Also, to create a good color contrast and to give a brightness effect the red acessories are metallic.

Shapeways


UPDATE: 3d Printed model pictures.

 Photo on 1
 Photo on 2
Photo off 1