Showing posts with label sp2014. Show all posts

Thursday, May 22, 2014

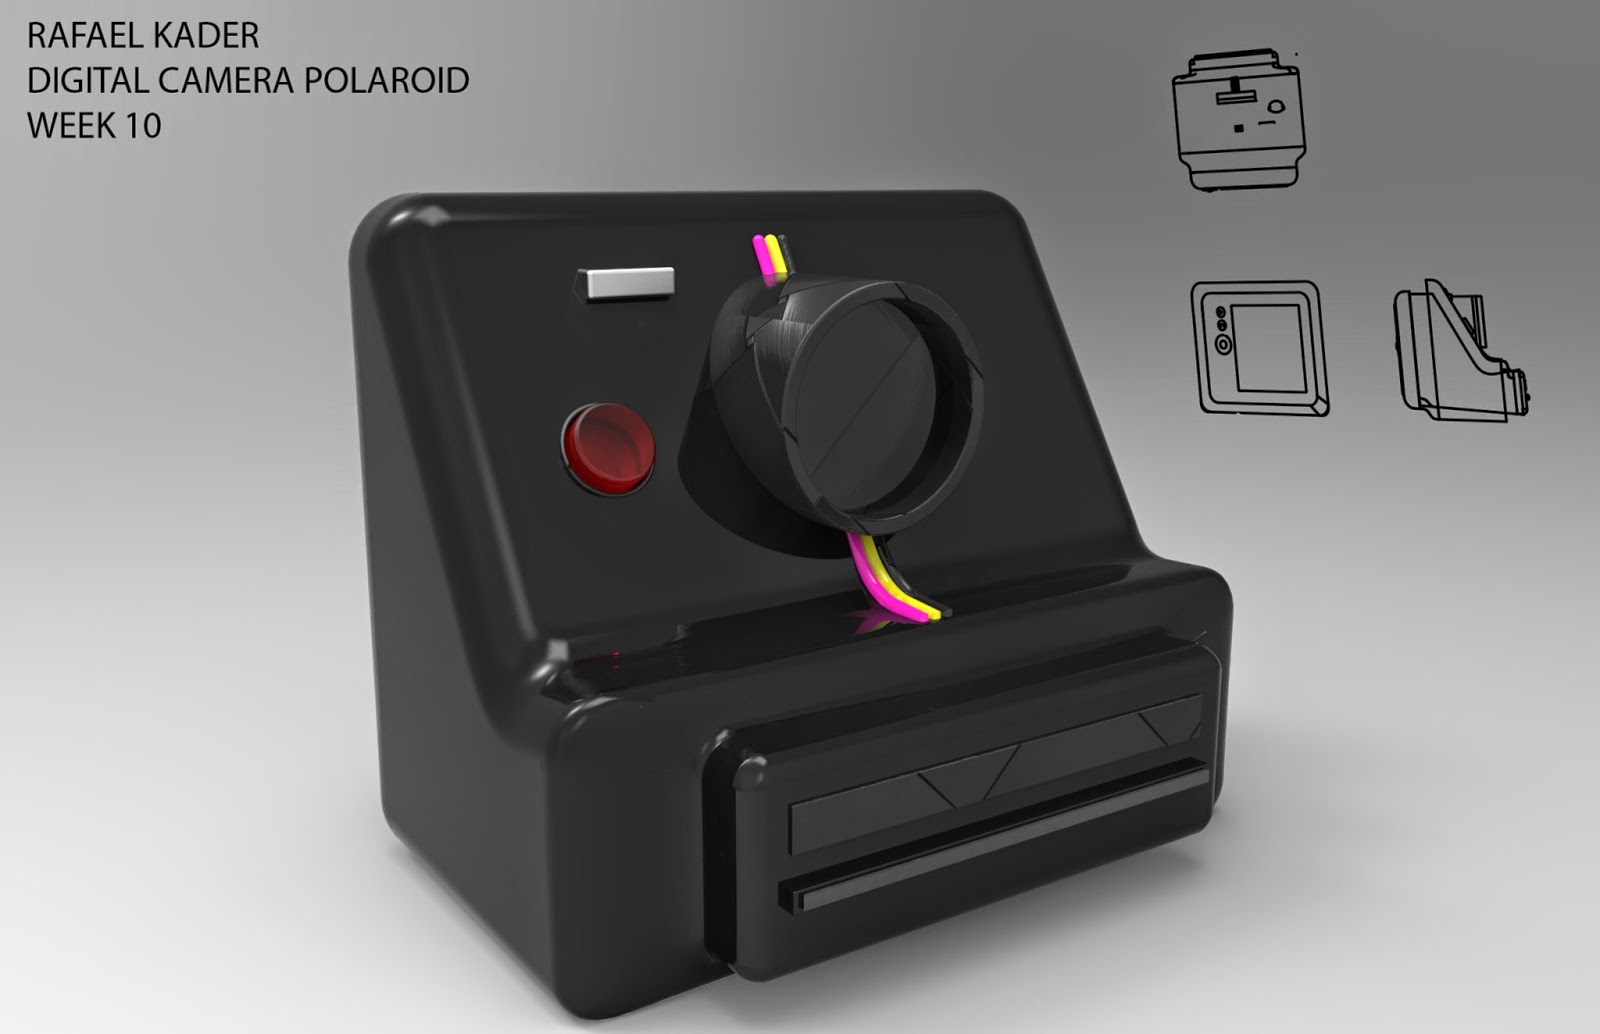
Rafael Kader: Week 10 Camera Model

 Ghosted Image 1
 Rendered Image 1
Rendered Image 2


In this last assignment, I started to create a hypothetical digital model for Polaroid. With this in mind, I tried to use the well-known shape of Polaroid Cameras, adding some new elements, blends, fillets, buttons and the LCD.

The techniques that I used for this project were: I started with a solid shape and then I used the command BooleanDifference to create a smooth body. After that, I used a lot of blendSrf e FilletEdge. Finally, using the make2d command I created the isometric drawing and the top, right and front view drawings.

For the materials, I chose basically different types of plastic to make it look vintage like the old sister of this camera. Moreover, there is a little bit of carbon fiber and aluminum as well.

Rafael Kader: Week 8 Tubular Chair

 Ghosted Image
 Rendered Image 1
 Rendered Image 2
Rendered Image 3


For this assignment, I was planning to create a chair with a simple but unique shape. Also, it was designed for be light and comfortable to sit and to move it around. It is called Futura chair because the shape and materials made it looks like a futuristic chair.

Basically I started this project following a bench tutorial, and then I added my own ideas and elements to this chair. The body was primarily a closed curve that I applied sweep1 to create the extruded surface. After that, I created the sit using extrudeCrv command, Trim and pipe.

In keyshot, I chose a Hard Shiny Black Plastic for the body to make it light and smooth. For the sit, I choose a variety of different colors of silk materials.


Rafael Kader: Week 7 Light Model

 Ghosted Image
 Rendered Image 1
 Rendered Image 2
 Photo Light Model Off
 Photo Light Model On
Photo Light Model top view

In this lamp project I started trying to create a Light Model with a twisted shape that suggests movement. After play experiment different shapes, I found on this one the perfect match between the finesse of smooth curves and the robustness of straight lines. It is called Ciclone lamp because of this parallel, smooth and strong.

Specially in this project, I started with a solid and then I used the command twist to create the shape. After that, using the commands Section and Contours to create the sections and the plugins on Rhino to cut the ribs, the final shape was almost done. Finally, using the make2d command I could print it using laser cut.

For the materials, in Keyshot I chose Oak Wood and Hard Rough Black Plastic. The finish product was made of a sheet of 24"x48" of MDF.

Monday, May 19, 2014

Calvin Mai: Week 7 Nautilus


For my lamp, I was inspired by the nautilus, and a seashell, and tried to combine aspects from both to create my final lamp design. I also wanted to create a economical and small lamp, so this lamp can be cut 4 times from a sheet of 24"x48" material

For my model, I created a base form with curves and then lofted it. After I created my base form, I sectioned it and used the pipe method to create the notches in the sections. After that I used massive unroll script to unroll it out. After I unrolled it, I extruded each of the surfaces to my material thickness.

For my lamp, I chose Red oak, as that would be my ideal material of choice for my lamps, but I used a default lighting environment that I played with the contrast and brightness. For my actual lamp, I used a corrugated cardboard, with the westinghouse light.

Thursday, May 15, 2014

Reed Herne: Week 7 Lava Lamp


As the title would indicate, the inspiration for the shape of my lamp was the original lava lamp. The form I used to derive my contours and radial sections is a slightly shorter and wider base than a typical lava lamp. To keep the design off the ground I allowed four of my radial sections to extend past the bottom contour; however, the lamp can also sit on lower by removing the extended sections. Along with the extended legs I also moved the hole for the light bulb up tot he second to last contour section, keeping the light away from the ground and making for an easier removal of the bulb.

In building the form of the lamp I used the draw curve and revolve tools as well as create cylinder and fillet edge. To cut my cross sections I used the contour, bounding box and section commands. Once I had my cross sections I measured my materials before using Prof. Scott's workflow tutorials to create intersection pipes and split my surfaces to create half lap joints. With my lap joints cut I proceeded to use the massive unroll script to layout my sections and color code them for laser cutting.

In Keyshot I did my best to emulate the color of the wood I used to cut my cross sections. I added an area light to the bulb and an aluminum to the bulb screw for authenticity. By lowering the brightness and raising the contrast of the environment I was able to create a nice shot of my lamp lit up.

Thursday, May 8, 2014

Rafael Kader: Week 6 Ring

Ghosted Image
 Rendered Image 1
Rendered Image 2
Shapeways Image

When I started this project, my intention was to create something that have mystic symbols. So, my inspiration for the Sannyasa Ring was a symbol called Sannyasa, which means the life stage of the renouncer within the Hindu scheme of four age-based life stages known as ashrams. In other words, the Sannyasa is a transition between the material world and the spiritual freedom.

Using this idea, I applied the command Crv2View in two joined curves of that symbol with a circular curve to create the shape of the ring. Moreover, I used commands such as project to create the details in each side  and boolean difference, fillet edge, and blendSrf.

For materials I chose two types of steel for the body and the details and a shiny clear plastic to recreate the precious stone. To render in passes I used the diffuse, reflection, and toon arrangements to make it look real and highlight the details.

UPDATE: 3d printed model picture.
Photo 1

It got just a little bit too small, so some of the details could not appear as good as it should be.

Wednesday, May 7, 2014

Calvin Mai: Week 6 The King


For my ring, really wanted to create something sexy and intricate, but nothing common, like some of the rings based off of the One Ring. So I based most of my inspiration from the crown that is given to Aragorn at the Crowning of King Elessar at the end of The Return of the King.

For my ring, I first created each of the elements, using curves to draw out the shape, create the surface with PlanarSrf, then extrude that surface at varying levels. I also used Boolean Difference, Union, and 2 objects, pipe and a lot of Fillet and FilletEdges to complete it. Finally, I extracted the surface of my ring, unrolled it, oriented my objects on the surface, then used FlowAlongSrf to orient everything on there.

For my materials, I just stuck with creating the same look as the crown, so I used a Cast Iron with Paint and changed it to metallic paint, to give the ring a dull metal look. I played around with the colors to change the accents and to give it a authentic look of metal.

Reed Herne: Week 6 Varsity Ring


 Inspired by the game of lacrosse given to us by the creator, the varsity ring can serve as a trophy, award or accessory. This piece of memorabilia can be customized to your team colors for personalization. Simple yet elegant the Varsity ring is a wearable reminder of wearer's experiences with their team playing the great sport.

In modeling the head of the stick I used the draw curve command as well as sweep1. For the shaft of the stick I used the helix command to create the initial curve, then a sweep1 command to create the shape. The butt of the stick was modeled using the tapered cylinder and the cylinder commands. To refine my model I used the boolean union and fillet command, creating one unified model and softening edges. 

The passes I used for my first keyshot image are as follows: flat colors, ambient occlusion, reflection and wireframe (with layer mask). For my second image I used the same passes with the exception of the wierframe pass which I replaced with a transparency mask (xray). To create my ambient occlusion pass I painted the ring white, set the material to diffuse and removed ground reflections and shadows. In Rhino I used the make2d command to create isometric and orthographic views of my design. After cleaning up my views in rhino I exported the line drawings to illustrator and from there I pasted them to my photoshop file.

Thursday, May 1, 2014

Calvin Mai: Week 5 Sunglasses (Slims)


For my inspiration, I based much of my design from the classic Ray Bans, but I gave it a nice modern twist.The hinges are magnetic, allowing for the sides to easily snap on or off, allowing customers to change and personalize their earpieces, with custom designs and colors. 

For the techniques I used, I used a combination of Curves and Crv2Views to model the sunglasses more accurately. That, combined with Bend for the Earpieces, FilletEdges, Split, Trim, Patch, ExtrudeSrf, and rotate, I managed to achieve the overall effect.

For my material choices, I used hard shiny plastics of varying color for the sides, and a black shiny plasti for the frame. I then used Aluminum for the accents and the hinges, and a glass for the lenses

Billy Nisbet Week:4 Detergent Bottle


My inspiration for the detergent bottle design is a water droplet. I wanted a sleek, functional shape, so i based the overall structure loosely around a triangle. The handle was designed from the same curves as the body to give consistency to shapes.

The tools used for this project were sweeps, lofts, offset surfaces to make the different layers. Network surfaces, and patch to close and smooth gaps, trim and split to ensure water-tight edges, helix for the cap, boolean processes for connecting and trimming objects. Filleting was used to clean up the end design.

For materials, I wanted a bright, crisp color for the liquid layer, i think this color projects an air of cleanliness. I wanted the flowing shapes to have harmony, so grey rubbers were used for their touch and (optical) feel. Plastic was used for the bladder portion of the model.