Showing posts with label week10. Show all posts

Thursday, May 29, 2014

Shameka Browne-Heskey: Week 10: Camera: The Snap Savvy

Ghosted image painted black

The green power light lets you know when the camera is on/ in use.

The side button only works when the front-facing camera is in use.


I wanted to have a sleek and slender design. I also wanted to add a front-facing camera, and have a shutter button that also operates as a power button.This camera is also touch screen and comes with flash, which makes it ideal for the modern-day selfie-lovers!

The basic shapes are rectangles with cylinders, and some of the rectangles have rounded edges (the screen and the front lens). The base cylinder was blended with the camera's body to add a seamless touch. The corners of the camera and the lens edges are slightly filleted. Lastly, both the side and top shutter buttons were made using the offset surface command.

I used scratched copper for the base of the lens and polished copper for the shutter buttons, because I liked that it had a rose gold effect. The body of the camera and the lens are made of anodized rough black metal.

Jeffrey Tindi | Week 10 | Camera


My camera was inspired by the iphone. I wanted to create a hand held camera that could fit in small places. It has zoom lens. Its a basic camera used only to take HD shots. The Guru camera is your camera to take pictures on your own journey.

The main techniques I used were Fillet which I used on a rectangle which I extruded. I then created multiple circles using offset. I extruded those curves then used boolean difference to get my lens. I used curve to create the back screen and the flash slot.

My material choice was hard plastic. I used aluminum mesh for the flash and basic aluminum for the lens. I played a bit with its specular and rotated the world until I got the highlight I wanted for the shot


Nico DeLuca-Verley and Blake Stephenson: Week 10 Kite


     Our Delta kite was designed to include pieces of the flags from our home state. On the left wing, the kite is decorated with 11 stars. Since Nico is from Rhode Island, the right side of the flag includes an anchor and a little flag at the bottom that says hope on it. Blake is from North Carolina so the right side includes a large N and C that lay beside the anchor. The color scheme we used includes the all American red, white, and blue. Then the panels include a golden yellow, black, white, and a lighter blue as well. 

     Our kite was assembled by the instructions that professor Scott sent to us.

     The materials we used were...

Wednesday, May 28, 2014

Sarah Brodsky Christian Edwards Week 10: Kite

Close-up Kite

30 Second Flight

High Flight Shot
Sketches
For our kite design concept we wanted to create something that honored a cat named Frank. During this initial concept contemplation we decided that a tail would be appropriate to balance the kite in flight. Additionally we double taped the outline of the kite to make it sturdy and this did not effect the performance of our kite as we had anxiously anticipated.

In creating the kite we first folded our plastic tablecloth and measured out our measurements and cut the kite accordingly into an isosceles triangle. Next we arranged our wooden dowels and outlined the kite with two layers of duct tape for extra support. Then we attached the smaller cut isosceles triangle in the middle. After that the grommets were added. Then it was the fun part where we got to paint Frank's lovely face.

To create this kite we gathered plastic tablecloth, rubber cement, duct tape and a line to hold the kite. These materials were great because they were lightweight In addition to these materials we used paint to create a cat face honoring the great cat Frank. Grommets were also used to attach the kite to the string used to have the kite in flight.

Sarah Brodsky Week10: Camera


 NakedEdges
Rendered 1
Rendered 2

My concept was to design a small and attractive camera. I created a unique shape, added classic round buttons and a shortened lens cap. This camera is designed to be easy to use, sleek and sturdy. This camera is aimed at any consumer looking for an easy to use, reliable camera. The screen is nice and large to see what is being shot. The eye-hole has been removed for a more modern feel. 

To create this design I made a rectangle. Then I used the extrude command to create a thickness for the rectangular body. Next I filleted the edges to my liking to create a sleek and curvaceous look. After this I created the lens which was made using the truncated cone. Then I created a cylinder to fit inside the lens, used the BooleanDifference command to remove the inside and then created another cylinder to fit within the space and act as the camera lens. Next I created by making tiny cylinders and placed and attached them accordingly. I then created another rectangle and extruded it only slightly to create the screen for the back of the camera. I then used keyshot to find appropriate materials that would be both attractive and efficient for this design.

I chose to use copper materials because I think copper can be rather attractive and I would like to recognize that. I then chose to use a yellow plastic for the buttons and two kinds of copper to create a variety in color. These materials are sturdy, can be recycled by pennies and sleek for my design. 

Katharina Fuetterer and Melissa Shuford: Week 10 Captain Kite


Monday, May 26, 2014

Sarah Brodsky Week9: Chairs

Naked Edges PennyChair
Rendered 1 PennyChair
Rendered 2 PennyChair
NakedEdges MoonChair
Rendered 1 MoonChair
Rendered 2 MoonChair

The concept for these chair designs was to provide a comfortable back support to the consumer. The second design also has a desk space that includes a box that has outlets for charging purposes. These chair designs provide the user with a spacious and comfortable space. The desk space has different layers to provide for an optimum level of organization. These qualities are important for a travelling consumer. There back and neck are tired and there technology is dying. My design will create a comfortable and relaxing space.
To create the first design I created a curve using the curve planar line. Then I used the pipe command to create a thickness for the line I had drawn. I then used the ArrayLinear command to set the pipes side by side in an attractive manner. Next I copied and rotated each piece so that it fit in a square manner. I then created a circle to fit in the middle of the back facing chairs. I then used the Pipe command to again create a thickness for the chairs. For the other design I created a shape using the curve planar line tool. Then I extruded the shape and used the cap planar holes command to seal the shape. I then used the cylinder tool to create the two disk like desks on either side of the main desk area. To create the main desk area I used the rectangle tool. To make the edges softer I used the fillet command. 
For my first design I decided to only use copper. I felt that this was an attractive and recyclable material. It would be cheap and could be built by melting down pennies which are soon to probably leave US currency. For my other design I chose to use a blue plastic material for the seat which could be easily made of recycled water bottles or other plastic packaging material like plastic bags. I then chose to use a steel for the desk because it will be easy to clean and it will be shiny and attractive.


Thursday, May 22, 2014

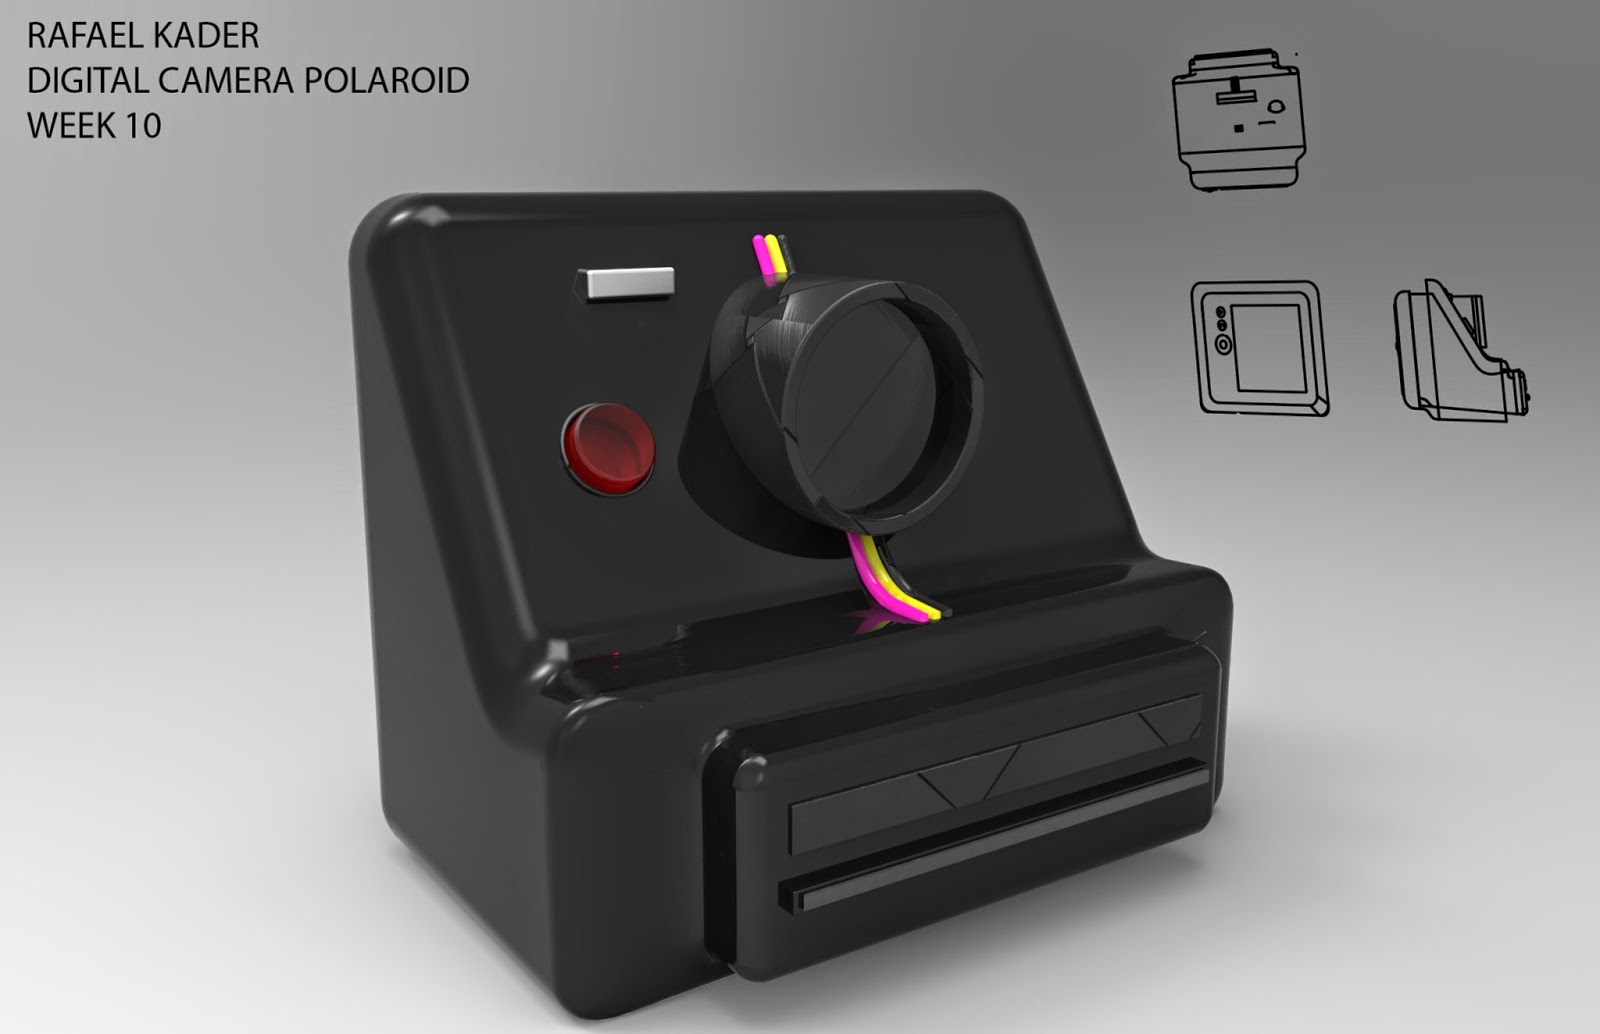
Rafael Kader: Week 10 Camera Model

 Ghosted Image 1
 Rendered Image 1
Rendered Image 2


In this last assignment, I started to create a hypothetical digital model for Polaroid. With this in mind, I tried to use the well-known shape of Polaroid Cameras, adding some new elements, blends, fillets, buttons and the LCD.

The techniques that I used for this project were: I started with a solid shape and then I used the command BooleanDifference to create a smooth body. After that, I used a lot of blendSrf e FilletEdge. Finally, using the make2d command I created the isometric drawing and the top, right and front view drawings.

For the materials, I chose basically different types of plastic to make it look vintage like the old sister of this camera. Moreover, there is a little bit of carbon fiber and aluminum as well.

Wednesday, November 20, 2013

Jamie So Whi Lim: Week 10 Laser Scan

For this project, I worked with Kirsten. We tried to scan a few objects like a watch, doll, and a panda light. The most successfully scanned one was the panda, so we decided to work with it. We smoothed out the panda with rapidworks. When we brought it to rhino, there was not much to fix.
Then I remodeled the panda light. I rebuilt a sphere and moved the control points around. When I was rendering in keyshot, I used a blue area light for the inside, and a clear plastic for the outside so that the color of the light would show through the outside part of the panda.
For the rendering of the original rhino with meshes, I used soft rough plastic with red color.


meshes in rhino
close up view (meshes were too close together)
remodeled in rhino
original mesh rendered in keyshot


remodeled rendered in keyshot

original panda light