Showing posts with label MatthewGrello. Show all posts

Thursday, November 21, 2013

Matthew Grello: Week 10 3D scan

original object

mesh

Dapper render

Dapper render 


 For my scanned object, I worked with Christian McKenzie. For our model we used a vinyl toy that Christian had, minus the head. After scanning the object, it took several families and patches to align and fuse in order to achieve the mesh I exported into rapidworks. In rapid works I ran a repair wizard and sanded some rougher patches, then exported the model into rhino. Since the item we used was the body of a doll, I decided the best course of action would be to add a head, but had to make sure I kept it classy, so I added a top hat. In Keyshot, the body of the doll and head are a soft grey plastic, and the eyes and mouth features are a rough black plastic, and to top it off the hat is a black leather with a grey leather accent.  

Matthew Grello: Week 10 camera

ghosted

render-1

render-2

lovely family

render-3


    For my camera, I wanted to do something a little more unusual, something that is not seen much today and somewhat forgotten, I wanted to do a film camera. Not just any film camera though, I wanted to do the "Stocker-shot". This uniquely deigned camera incorporates a stock into the film drum of the main body, this give the individual optimum stability when capturing those classic moments. Being that the camera uses film to create an image, no LCD screen was added, just a view finder and a trigger. The "Stocker-Shot" is always ready to get the best shot, even at a distance.
  For the modeling process, i primarily used the blendsrf command to span the gaps I created with the pipe and split tools. The lens' and their respective housings where created with the revolve tool and the eye-piece was done with the Crv2view command. This project made me realize the versatility and effectiveness of the blendsrf command, I found that creating one inherent solid was much easier and came out much cleaner, due to this process.
  In Keyshot rendering, I decided that a black leather surface with polished aluminum accents would give this camera a more "vintage" feel, the focusing wheels are a hard plastic, while the casing of the lens is a rough aluminum painted black.
   Inspiration for body and stock. Inspiration for material choice

Tuesday, November 12, 2013

Matthew Grello: Week 8 Tubular Chair

Ghosted view
Layered view

Render1 w/ perspective

render2 w/ ortho

render3 w/ dimensions 

                For my chair, I wanted to do my own take on a basic sitting chair. I wanted it to be cushioned for comfort, and have a nice and shiny frame for aesthetics. Being a furniture minor, I was very much looking forward to this assignment, the design I executed is actually a chair that Ive been interested in creating for some time now.
                The modeling of my chair primarily consisted of piping curves that I derived from either the line tool, or from a poly-surface. I than booleaned and filleted the edges, also using blendsrf on troublesome areas. The cushions are a planercurve that I rebuilt and manipulated the control spots with the scale1 command, I then projected lines over the cushion, intersecting at the depressed areas, then piped and booleaned the curves.
             In keyshot, I used a polished steel for the frame and black leather for the cushions. The beads on the cushions are a grey leather and the buttons are either leather or steel. I choose these materials because I enjoy the contrast of a very industrial material on a natural one. Inspiration for name Warrant

Tuesday, November 5, 2013

Matthew Grello: Week 7 Lamp

ghosted w/ ortho view
render wood 2
   

render acrylic, w/ ortho
render acrylic 2, w/ cutsheet 
render wood 1
lamp-off

lamp-on
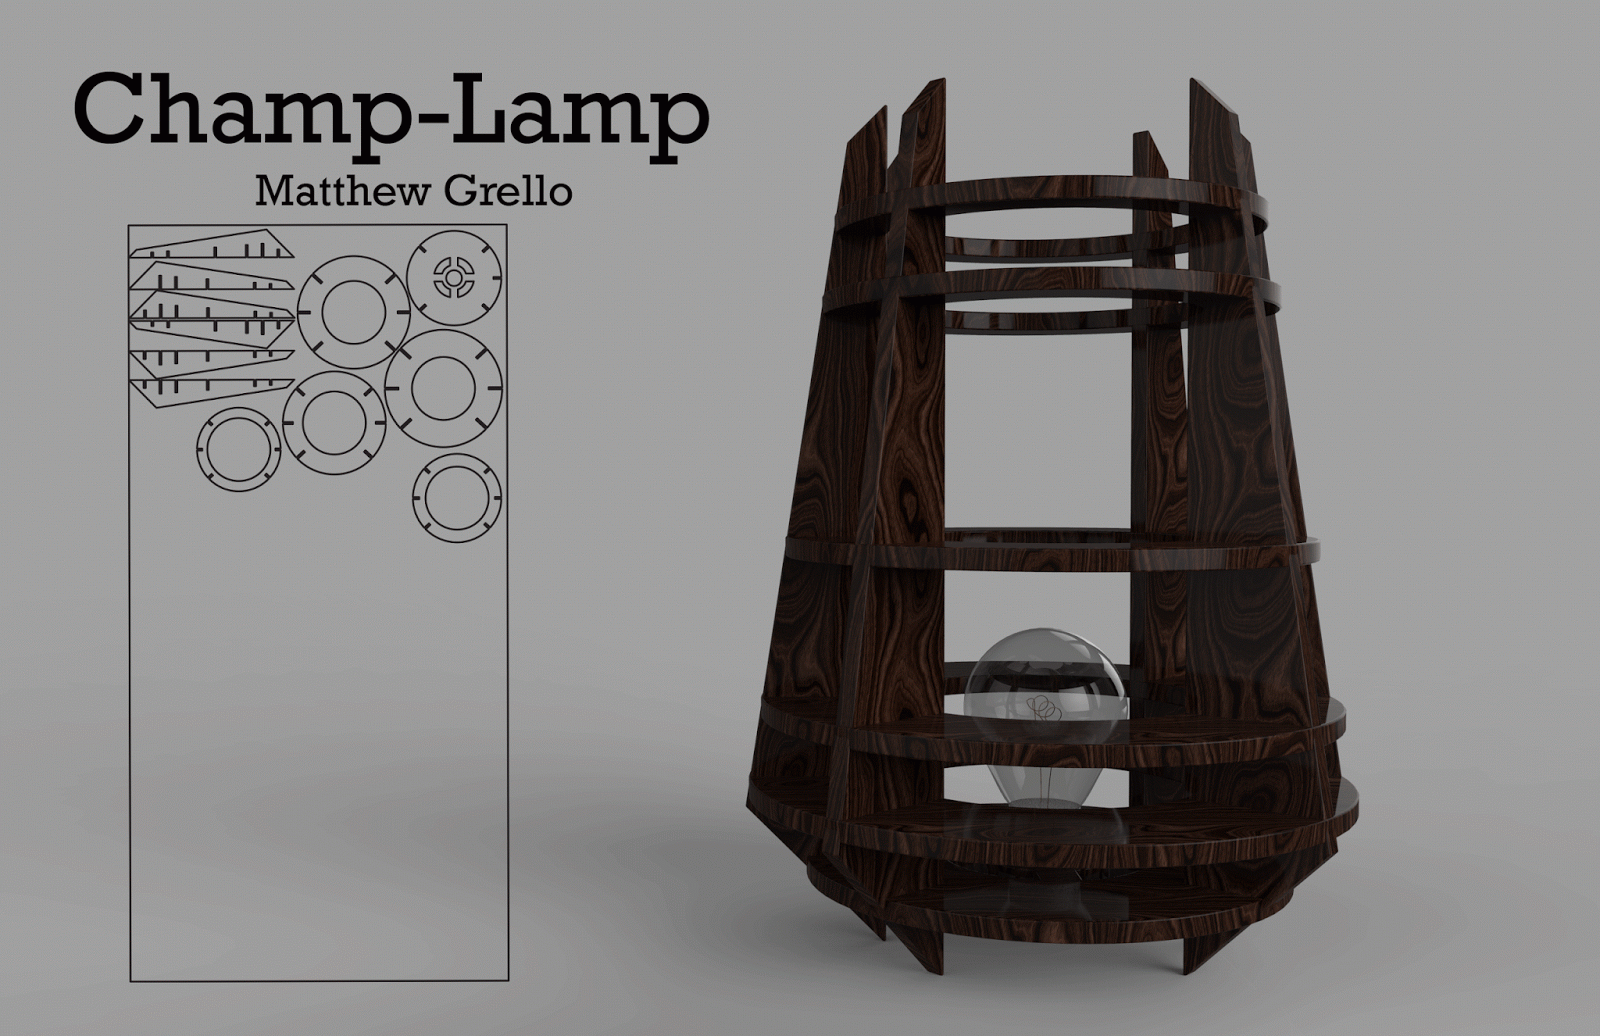
               The lamp that inspires champs, the champ-lamp, designed to be simple and cost-effective, the champ-lamp does it all. When I modeled the champion of lamps, I started with the curve tool in the "front" window, I then drew my curve and used the revolve command. I than used the "section" and "contour" commands the create the curves that would become my surfaces. I deleted the curves I did not want for my design, then I highlighted the curves and did the "Planer curves" command to get my surfaces. I used the command "intersect" to highlight the intersections to pipe my curves. I then piped the intersection curve, moved the end to the midpoint, than repeated so that i had two piped bisecting the curve. I then repeated this  process on all the curves. Then using the pipes I split the surfaces to get my notches, then ran the massive unroll to create my cutboard.
             In keyshot I wanted my lamp to live up to the name, so i used that sexy plexi glass, alternatively, I could use a black walnut, equally sexy and available. For the light bulb I used glass for the bulb, and used area light for the filament, I then tweaked the settings until I got the desired glow, much like my idle, Bruce Leroy.

Tuesday, October 29, 2013

Matthew Grello: Week 6 Ring Model

Ghosted

Layer-ring

Ringdered  

Ringdered 2

Ringdered 3
ring 1

ring 2
Inspiration for the my "Safe-Ascend" ring comes from my personal love for rock climbing. The ring itself is based of the belay and repelling device called an "ATC", this device allows people to both ascend and descend a rock face safely.
  For the modeling of my ring I primarily used the extrusion command set to solid, and then through projection curves and boolean tools, I shaped both the top and bottom halves of my model. I chose to incorporate the same logo from my previous climbing related model, the hammer, to break up the surface of the top piece.
   In Keyshot, I chose to make the ring entirely out of aluminum in order to conserve weight while maintaining strength, the exception being the logo, which is again a hard plastic.

Tuesday, October 22, 2013

Matthew Grello: Week 5 sunglasses

Ghosted

Ghosted layers

ghosted w/ pictureframe
rendered

rendered
render back
detail

rendered clear lens

render clear lens 


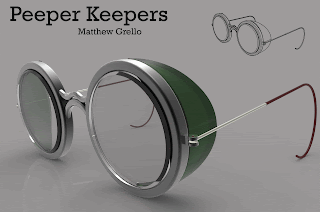
     For my glasses, I chose to create a set of safety glasses. I have always found most modern-day safety glasses to be uncomfortable and bulky, so for my aptly named "Peeper Keepers" I decided to model them after the classic welding/safety glasses of years past, such as these: example 1example 2
    When constructing my glasses in rhino, I primarily used extrusions for the lenses and frame body, I than filleted the edges and used the lenses cylinder to boolean out a space for the lens to fit. For the nose piece, I used the arc tool for the lower arc and then I traced the line of the decorative piece over the pictureframe, offset it, than extruded the curve after connecting the ends. The ear pieces are a piped line with filleted edges, I than cut the pipe in half, that offset it to create the cushioned back piece to the ear hooks.
   I Keyshot I primarily assigned metal materials for the glasses, being safety glasses I felt that a durable material made the most sense, so I used aluminum for the frames, and steel for the ear, nose, and hinge pieces. The back of the earpiece is a molded plastic and the lenses are colored and clear glass.

Tuesday, October 15, 2013

Matthew Grello: Week 4 USB

Ghosted 1
Ghosted 2

Ghosted w/ layers


Render 1

Render 2
For my USB, I followed the tutorial and put my name on it. For keyshot I used hard plastics for the body, Rough for the main body, Shiny for the red parts. I also used an aluminum for the male USB component and accents. Under the logo I use an emissive object to indicate when the USB is receiving a signal

Matthew Grello: week 4 Detergent

Dershy ghost
Dershy ghost w/o cap

Dershy layers

Dershy render

dershy render 2

 My inspiration for the "Dershy Detergent" bottle came from the very bottles that sit on my laundry machines, but I decided that creating a window for one to see the product would be an improvement. For the construction of the model, I primarily used the sweep2 and loft commands, and some boolean with various extrusions. for the liquid inside the vessel, I changed the properties of the object on the inside of the bottle to be chlorine and than played with the level of transparency. In keyshot I mostly use hard shiny and rough plastics for the body and cap, while using water for the liquid and a clear glass for the "windows"

Tuesday, October 8, 2013

Matthew Grello: Week 3 Mouse

Ghosted

layers

rendered
rendered


rendered
For my mouse I decided to stay basic, I had functionality in mind when designing the button layout and body shape. I followed the tutorial provided on the page, so I used the sweep, and loft tools to get most of the shape for my mouse, I also used the boolean tools and pipe to add details. For keyshot I used hard plastics for the main body, soft touch for the thumb rest, hard-shiny plastic for the details, and aluminum for the scroll wheel housing.