Showing posts with label elds. Show all posts

Thursday, May 8, 2014

Sarah Brodsky Water and Air Pinky Ring: Week 6

 
Naked Edges
Rendered 1

Rendered 2
The concept of this ring is to meet the wants the glamorous consumer who is a lover of the earth at heart. This ring is made of elegant glass and sapphire materials. I wanted to create something that looked modern and rounded. I wanted it to be subtle yet a striking complement to any outfit worn with the ring. 
To create this ring I designed my own curve by using the control point curve. I then revolved my design to create a ring shape. Then I created another curve using the radius tool. Then I piped this curve and used BooleanDifference to create the indent. To make the gem shape I manipulated the surface from an ellipsoid using the f10 command. 
I chose to use a clear glass and sapphire for style and serenity. Glass is a very silent and calming material that I felt complemented the design for this ring. I chose to use Sapphire because it is a very beautiful stone. This modern and elegant ring is very flattering and this piece would make a lovely addition to any fingers.


 3D Print
3D Print

Tuesday, April 22, 2014

Ruan Basson: Week 4 Detergent Bottle

 Ghosted view
 Birds Eye View
Ant View

I wanted to design a bottle that was beautiful.  Simple as that.  I want the user to be able to feel comfortable leaving it out in the open without feeling embarrassed or self conscious about the look of their product.  This was the idea behind the Haute Deto Bottle.  I kept lines minimal and purposeful.  They flowed with the form and gave a sensual aesthetic to the bottle as a whole.  Haute Deto is the perfect luxury detergent bottle.

I used the loft command over curves I drew to get the overall form.  I then used a series of curve projections to get the "sliced" cap, the body curves, and eventually to separate the lid from the body of the bottle.  I then used the Offset Surface command to get the clear indentation.  Sweep 2 took car of the concave curves.  There were some problems with this method because they made it difficult to fillet and made a few naked edges.  I used the Join Naked Edges Command to try and get rid of them, however there are still some small leftover edges in this region.  All methods that I am familiar with could not help me join the edges, as small as they all are  I then used the Offset Surface command to get the thickness of the bottle.  I tried to get liquid on the interior using boolean difference, but it somehow looks odd in the rendering.

I chose plastics as the material, to show what the bottle might actually look like after manufacturing.  I like the minimal color scheme of black and transparent as they will fit with any household decor and still stand out beautifully.  The liquid inside is just a painted color, but does not show through the plastic section very well

Thursday, April 10, 2014

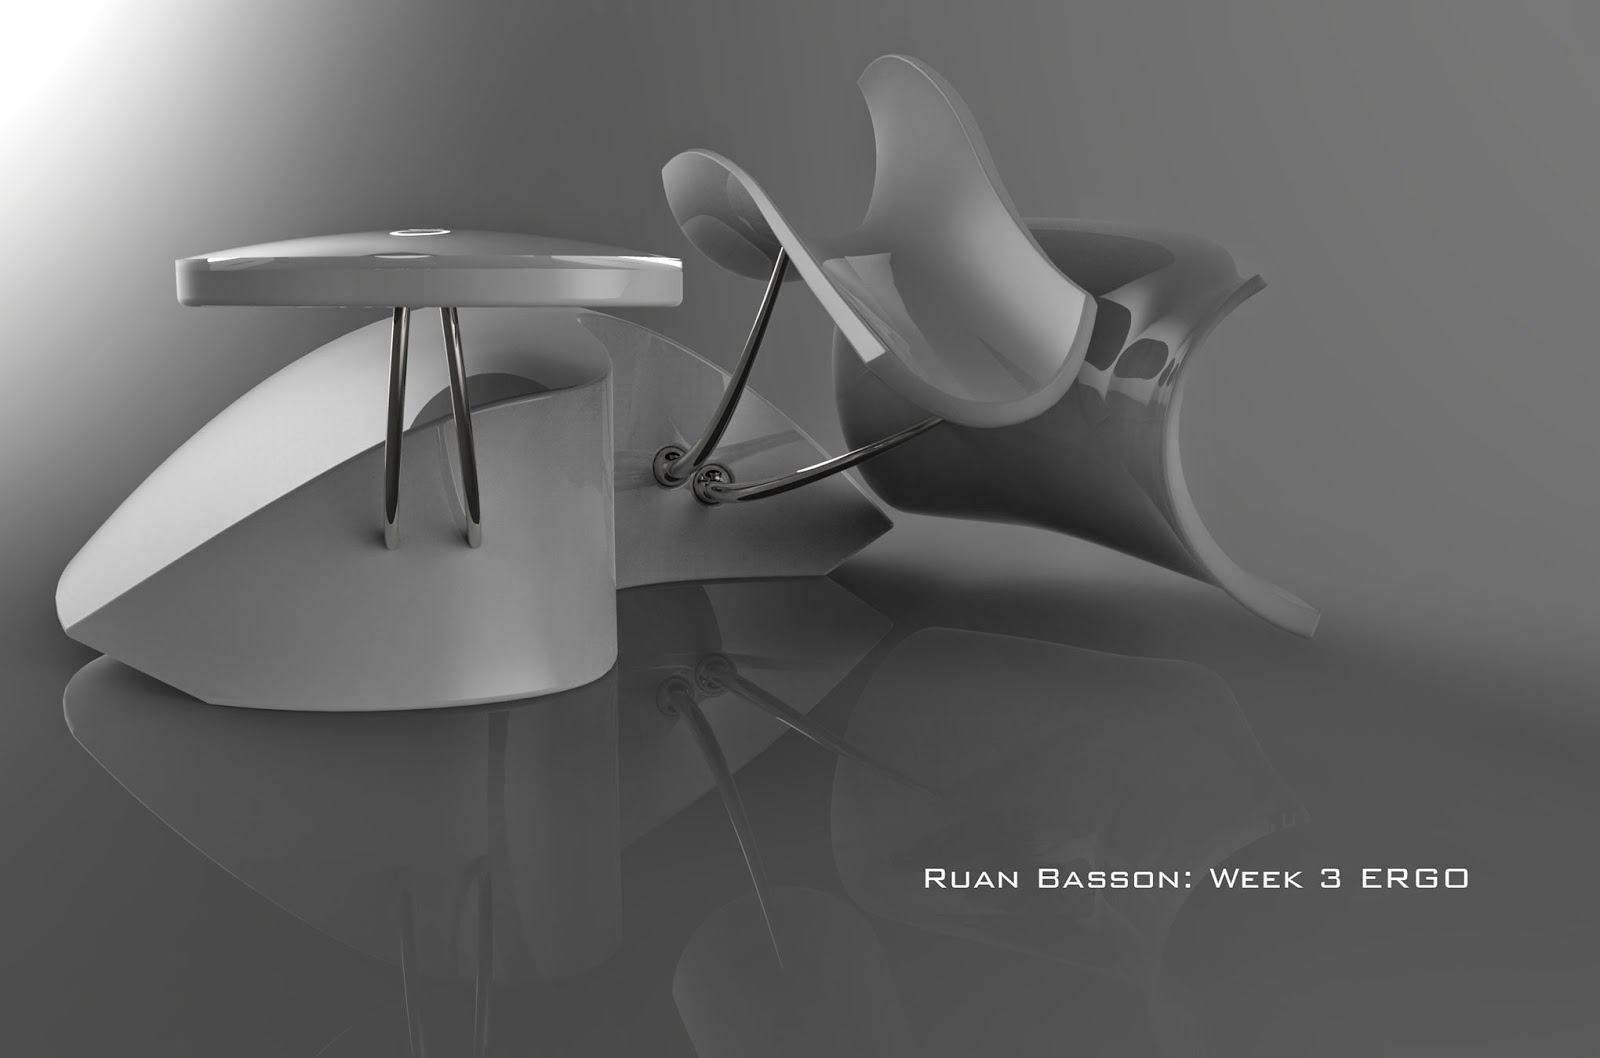
Ruan Basson: Week 3 ERGO

Ghosted

Elevated 3/4

Elevated 3/4 (opposite)

Ant View 3/4

The inspiration for this mouse lies in ergonomics.  I used this keyboard as a jumping board to figure the function of the mouse and how I wanted the user to interact with it.  I also wanted to keep a sleek and sinuous form while maintaining my minimalist aesthetic.  The pointer finger and thumb rests are actually the left and right mouse buttons.  To click one simply pushes down on the rest.  The elevated pad with the lighted rings is a capacitive touch screen to scroll and pan with the middle finger.  This rest is stationary and does not move.  To click one would simply tap twice and hold their finger on the pad the second time. I really enjoyed modeling this mouse.  

I used a lot of piping for the forms.  The forefinger and thumb are piped, then I projected a curve to cut them, scaled and copied the form and used Sweep2 to connect them (after making connecting segments).  The body was done the same way as in class, but I projected a curve to cut the shape to its final form.  The only edges I could not figure out how to fillet were the ones at the rear of the forefinger and thumb rests.

The materials I used were white plastic, titanium, and glass for the capacitive touch pad.  The forefinger and thumb rests are a soft plastic to add comfort.  I felt that the materials should be close to what they would be if the product was actually produced.  I feel this would also make it more affordable too. 

Monday, April 7, 2014

Parker Williams: Week 2: Flashlight


Ghosted Black Image


Front View


Rear View


 Introducing the K-Dub X 7 flashlight and taser in one. My dad was inspired by my dads insane collection of slick black tactical gear including machine guns, flashlights, and knifes. I had the idea to give it a unique tactical carbon fiber look with polished steel grips and spikes with a luminous red LED light inside. This weapon can be used one of several ways. It has side spikes and front spikes for stabbing, high powered LED light for stunning an enemy, and a 500,000 watt stun gun that runs electricity through the front end spikes.

 I started with two cylinders which I overlapped and did a Boolean difference on to create my one inch hole to tightly fit my flashlight down into. Next I used F10 to pull together the end to securely hold the light in without it falling out and hit F11 to escape the command. The tunnels around the edge to create the grip were created using the pipe command and using 360 to make it spin around the center snap to make it complete. To spin it around, I used ArrayPollar which was commonly used in this entire piece. The spikes were the easiest once I set them and Arrayed it, but because I didn't center everything properly on 0,0 I had to mess with a lot of different objects.

The spikes are just extruded pyramid shapes that I did a array polar on to perfectly make 4 symmetrical spike,m in two rows, at a 360 degree multiply to create all 8 on the side and same for the front, just with a few more smaller spikes. This project was really interesting because with the castle, it was all rectangles for the most part, and this whole project consisted of mainly cylinders. I really enjoyed it and glad I got to learn how to design this tactical self defense killing machine.


Tuesday, November 19, 2013

Andrea Carriquiry: Week 9 3D Scan


For the 3D scan project my team and I scanned a foam model of a lock. After completing the scanning process. I imported it into rhino and modelled it by replicating the shapes. Using curves and extruding them or using actual shapes.
For the materials I decided to use for the Keyshot rendering were colored anodized metal to make the lock stand out, as well as make it more appealing to look at and easier to find. I decided to make a key just to go with it and make it the same color so people could have different locks and keys and this way they can easily find which key belongs to each lock.
I think the scanning technology is that is available for us to use is incredible and that also could be extremely useful as in the following years here at SCAD, we will be able to make prototypes out of foam and then scan them and import them into rhino and be able to fix them, and create a cleaner prototype by 3D printing it.


Monday, November 11, 2013

Andrea Carriquiry: Week 8 Chair


For this design i wanted to make something very clean, simple and elegant. Very minimalistic but taking into consideration, style, comfort as well as the aesthetics. I wanted to economize the use of lines, in this case pipes, in order to make a very clean and classy design. I decided to add extra pipes to the back and under the cushion in order to make it more stable and sturdy. I wanted to do a bench instead of a chair so people could sit or lay down on it that's why i named it "The Lazy Way".

For the logo i used the tutorial from blackboard, and decided to use my initials. I made it a bright blue anodized metal, so it would stand out. 

I used curves to draw out the contours of the chair and then made them into pipes. Then i did the same with the support on the back and below the cushions. I boolean all the unions between these pipes to make clean and smooth unions. For the cushions i used a rectangle, which i altered through the control points to make it rounder, and also filleted the corners. Later i extruded the surface to create the cushion.

For materials i decided to go with stainless steel for the pipes, as it is a sturdy metal that will never rust, as well as a black leather for the cushions to give it a very classy and elegant look, so it could be easily placed in any living area, because of the neutral colors.

Wednesday, July 31, 2013

Christina Byun : week6 ring

My ring i named as Ring Tx, and it is triple rings that person can either wear one or more, the main ring(biggest one) is made with metal and plastic at the edges, and other thin rings are the glass looking plastic material to give less weigh. i used several colors in different areas to create more choices to the picker. i tried to give more information of the rings, therefore i add orthographic views( front, side, and top views), and closed up pictures.


----wearing all together----


ghosted view

Wednesday, July 24, 2013

Chrisitna Byun : week 3 mouse

 this is my small mouse,,,i named Jr.mouse... inspiration for this mouse is actually from my first designed mouse 'mouse gloves', which is on the very bottom...it is big and rough so i wanted to minimize the size and the shape. therefore those small and simple shaped mouse created. i tried several colors and it was red, green, and blue with black color base. hope you like it.

top view


front view

perspective view

close op

front
ghosted view

----------extra----------
top view

side view

front view

Tuesday, July 16, 2013

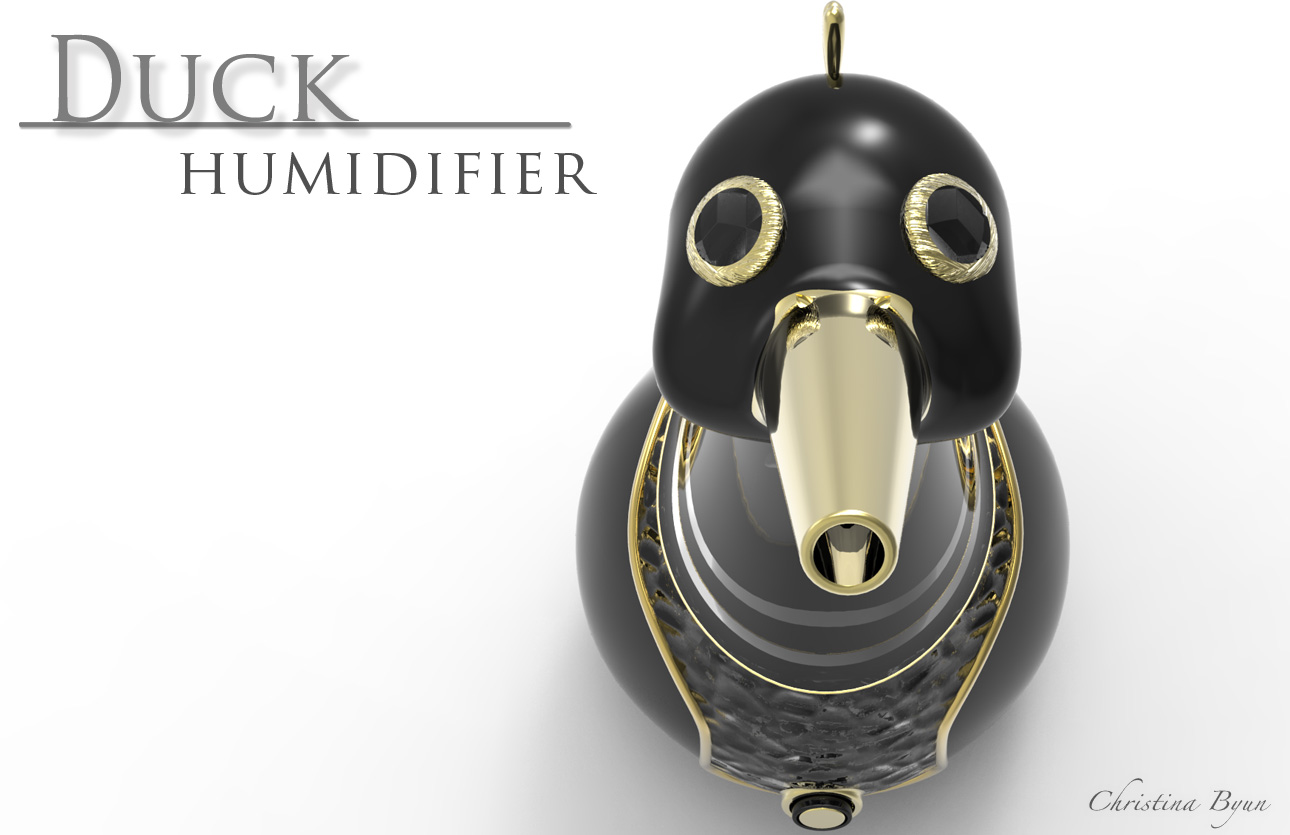
Christina Byun : week 2 Duck

for this concept, i honestly enjoyed to play with Keyshot program..as you can tell that i create several different colors and materials designs. my purpose for this design was 'duck humidifier', i actually create the design on the very bottom one first, and the final design that i liked is on the top, which is black and gold, red and silver colored. the inspiration is my friends water drop shaped humidifier.


Keyshot rendered view 
 Keyshot rendered view- front
 Keyshot rendered view-top
 Keyshot rendered view-back
 Keyshot rendered view-detail on the bottom

Keyshot rendered view- Red, front

Keyshot rendered view-Red, side
Keyshot rendered view-top close up

Keyshot rendered view-top
Keyshot rendered view-different material used
Keyshot rendered view-different concept.
Ghosted view